You already know how to brew beer using fresh hops, so now it’s time to take your craft to the next level. This Spring, grow your own hops in your home garden for a fun and rewarding experience. Here at Freshops, we sell a variety of hop rhizomes ready to grow! We’ve created a step-by-step guide on how to plant hop rhizomes in your preferred earth patch to get you started.
Choose a location
Location, location, location! Hops plants love plenty of sunlight and room to grow, so choose a location with at least six hours of direct sunlight daily. We recommend a south-facing spot. Hops also need a lot of space because they may grow to 20 feet tall, and their roots like to spread out. Choose a location with well-draining soil and room for the plants to climb.
A sturdy support system is needed for the plant to climb on, especially in their second and beyond seasons. The first year hops focus on growing their roots. Look for space along fences, garages, or property lines. Some people grow them on pergolas, the side of their houses, or porches for shade.
Prepare the soil
Before planting your hop rhizomes, prepare the ground by removing or tilling any weeds and grass from the area. It’s a good idea to dig holes about one foot deep by five inches wide and then mix in some loam, compost, or well-rotted manure to improve the soil’s fertility at the root level. The soil should be prepped into a fine, friable condition before planting.
Plan out your spacing, as hop rhizomes should be planted about three feet (for like varieties) to five feet (if using various types) apart in well-drained soil. If drainage is problematic, try building small mounds using surrounding topsoil mixed with organic matter.
Plant the rhizomes
Hop plants grow from rhizomes, which are underground stems that send up shoots. When you first receive your rhizomes, store them in a plastic bag that has been slightly moistened, then keep them in a refrigerator until you are ready to plant.
Once the threat of frost is gone in early Spring, but no later than May (or June, depending on your zone), you can plant hop rhizomes. If you live in colder climates, you can plant rhizomes in pots and transplant them in June. Place one rhizome per hill with the shoots/buds facing up (see images on “Plant Hop Rhizomes Right.” Cover the rhizomes with one inch of soil.
Water and mulch
Water the newly planted rhizomes thoroughly, ensuring the soil is moist but not waterlogged. First-year hops are growing their root system and require frequent short waterings, much like any baby plant, but we recommend that you do not drown it with too much water.
Mulching the soil surface with some organic matter works wonders to conserve moisture and help control weeds. Once the hop is established after the first season, less frequent deep watering is best, preferably drip irrigation. Try not to soak the bine during watering, as that will sometimes encourage diseases.
Provide support
Hops plants are climbers and need a support system to grow. Hops are “bines” – which means they have little hairs that attach to climb upwards in a circular pattern. “Vines,” like with grapes for wine, have tendrils and suckers that attach while growing any which way. As a side note, people often interchange bines and vines when describing hop plants.
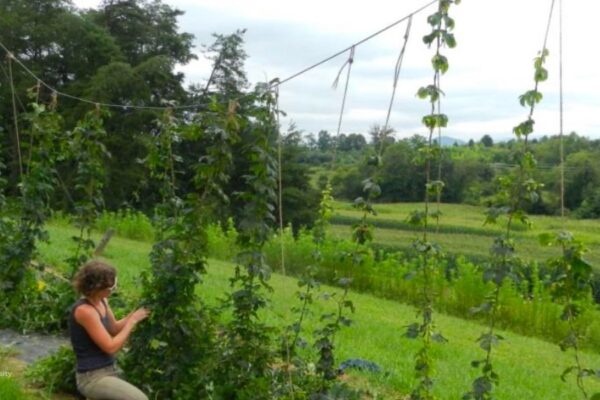
Install a trellis or other support structure near the plants. It is common to run 2-3 strings per “hill” – note, where you plant the hop rhizome is often referred to as a hill, even if you did not create a mound over it. When the young bines are about 1 foot long in more mature hops, 3-4 bines are trained clockwise per string. Next, teach the hop bines to grow up the support structure by gently tying them to it as they grow.
The bines are easiest to grow and deal with if trained on strong twine. This twine can be supported by a trellis wire, pole, tree branch, or building. Small diameter poles, lattice, and chain link fences also work but require more hand labor. Keep in mind that the vine does die back each Fall.
The remaining weaker bines should be cut off at the ground to focus more energy on the trained bines. Do not prune baby hops. Let everything grow!
Care and maintenance
Hops plants are relatively easy to care for but require some attention throughout the growing season. Here are some tips for maintaining your hops plants:
– Water hops regularly, making sure the soil stays moist but not waterlogged.
– Fertilize your hops with a balanced fertilizer once a month during the growing season.
– Remove any weeds or grass around the plants to prevent competition for nutrients.
– Prune second-year or older plants in the Spring to remove dead or damaged bines.
– Harvest the hops in the late summer or early Fall when the cones are fully mature.
Your Hop Garden
By following these simple steps, you can successfully plant hops rhizomes in your home garden and enjoy bountiful harvests of fresh hops for brewing beer. For more detailed information, check out our more extensive section, “Hop Gardening,” with nine areas filled with information.
Growing your own hops is a fun and rewarding experience. It allows you to brew beer with the freshest, most flavorful ingredients.
Cheers to homegrown hops! Now, Hop 2 it!